
May 16th 2022 - Monica Cunanan
6 Roasting Tips - Learn How to Make an Excellent Roast
Roasting may be among the simplest cooking techniques. You don't need to spend too much time in the kitchen and you put most of your effort into preparing the meal before actually cooking it. You choose the right meat, add seasonings, cut up vegetables ―then they cook, mostly hands-free until they emerge with a browned, hearty flavor.
Before you go shopping for ingredients, keep these essential techniques and roasting tips in mind:
Pick the right cut of meat
Large cuts of meat (like ham, whole turkeys, chicken, or tenderloins) work best for roasting. Boneless chicken breasts or fish filets may dry out if they're cooked in the oven. They're usually better sautéed.
There are lots of different types of meat that can be used for roasting, depending on how many people there are and your budget. When it comes to meat, you might choose a boneless chuck roast, which is a well-marbled, inexpensive shoulder cut that‘s great for preparing a single meal in a single pot, on the one hand, you can embrace all the possibilities of an exceptionally delicious piece of meat like prime ribs.
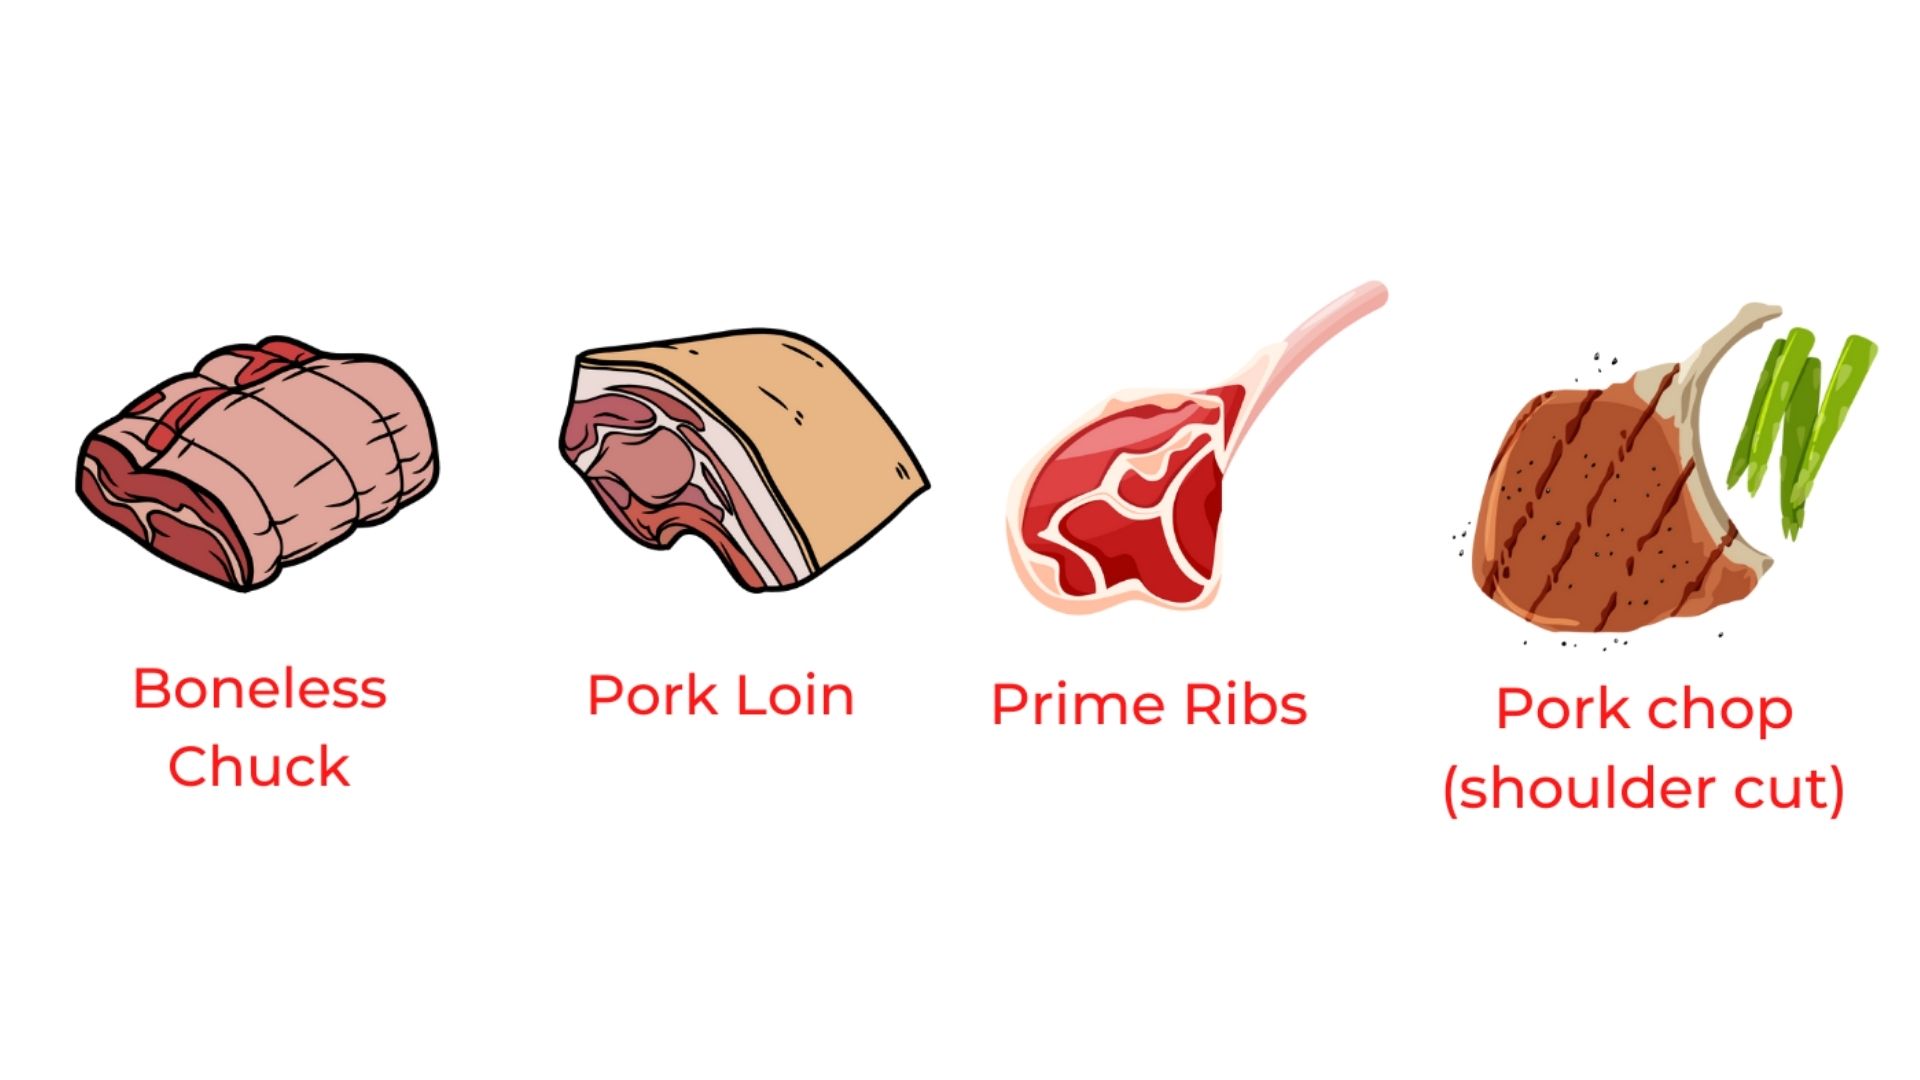
If you prefer pork chops, a shoulder cut is a cheap alternative that can feed numerous people. Pork loin is another good option if you want to please a crowd without breaking the bank. If you want to really impress everyone, you could go for the moist, tasty crown roast.
Seasoned Roast Meat Should Be At Room Temperature
If you take the meat out of the fridge and discover that it's still too cold to cook, then you're in for a bad time. Letting your meat rest at room temperature for an extra hour before cooking will help ensure it cooks evenly. Your roast will cool faster If it is at room temperature when you start cooking it.
You don't really want it to sit out for more than two hours because bacteria do grow in warm temperatures.
You may also start seasoning your meat once it has reached room temperature. Never forget the salt while getting your spice bottles containing your favorite spices and sprinkle them all over the meat.
Chef Polak once says, "Salt is to meat what color is to television". Use a large handful, sprinkled from approximately eight inches above the roast to ensure a uniform spread, and season all sides, including the edges.
Allow plenty of cooking time
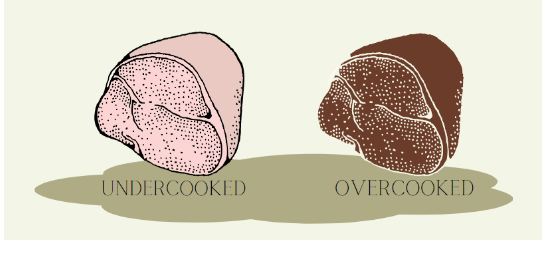
Ensure to:
- Not overcook the meat.
- Not to undercook the meat.
Keep an eye on the cooking process. Cooking meat should be done in a certain order (depending on what you're roasting). First, put the meat into the oven for 15 minutes at 450 degrees Fahrenheit.
Then, lower the heat to 325 degrees Fahrenheit and cook for another 10 minutes per pound of meat. Once the meat thermometer reads 120 degrees Fahrenheit, take it out of enough time in the oven, but don’t let it get dried out. Always check the internal temperature of your roast to ensure it’s cooked through.
Set Your Oven to the Right Temperature
Choose the temperature according to the type of food you're roasting.
Make sure the meat gets enough cook time, but don't let it get dried out too much. Check the internal temperature of your meat to ensure it’ll be done when you want it to be. Center the tip of the ovenproof meat thermometer in the thickest part (not resting in fat) of the beef. Follow the recipe exactly, and be sure not to go over the targeted internal temperature because it will continue to increase after removing the roast from the oven
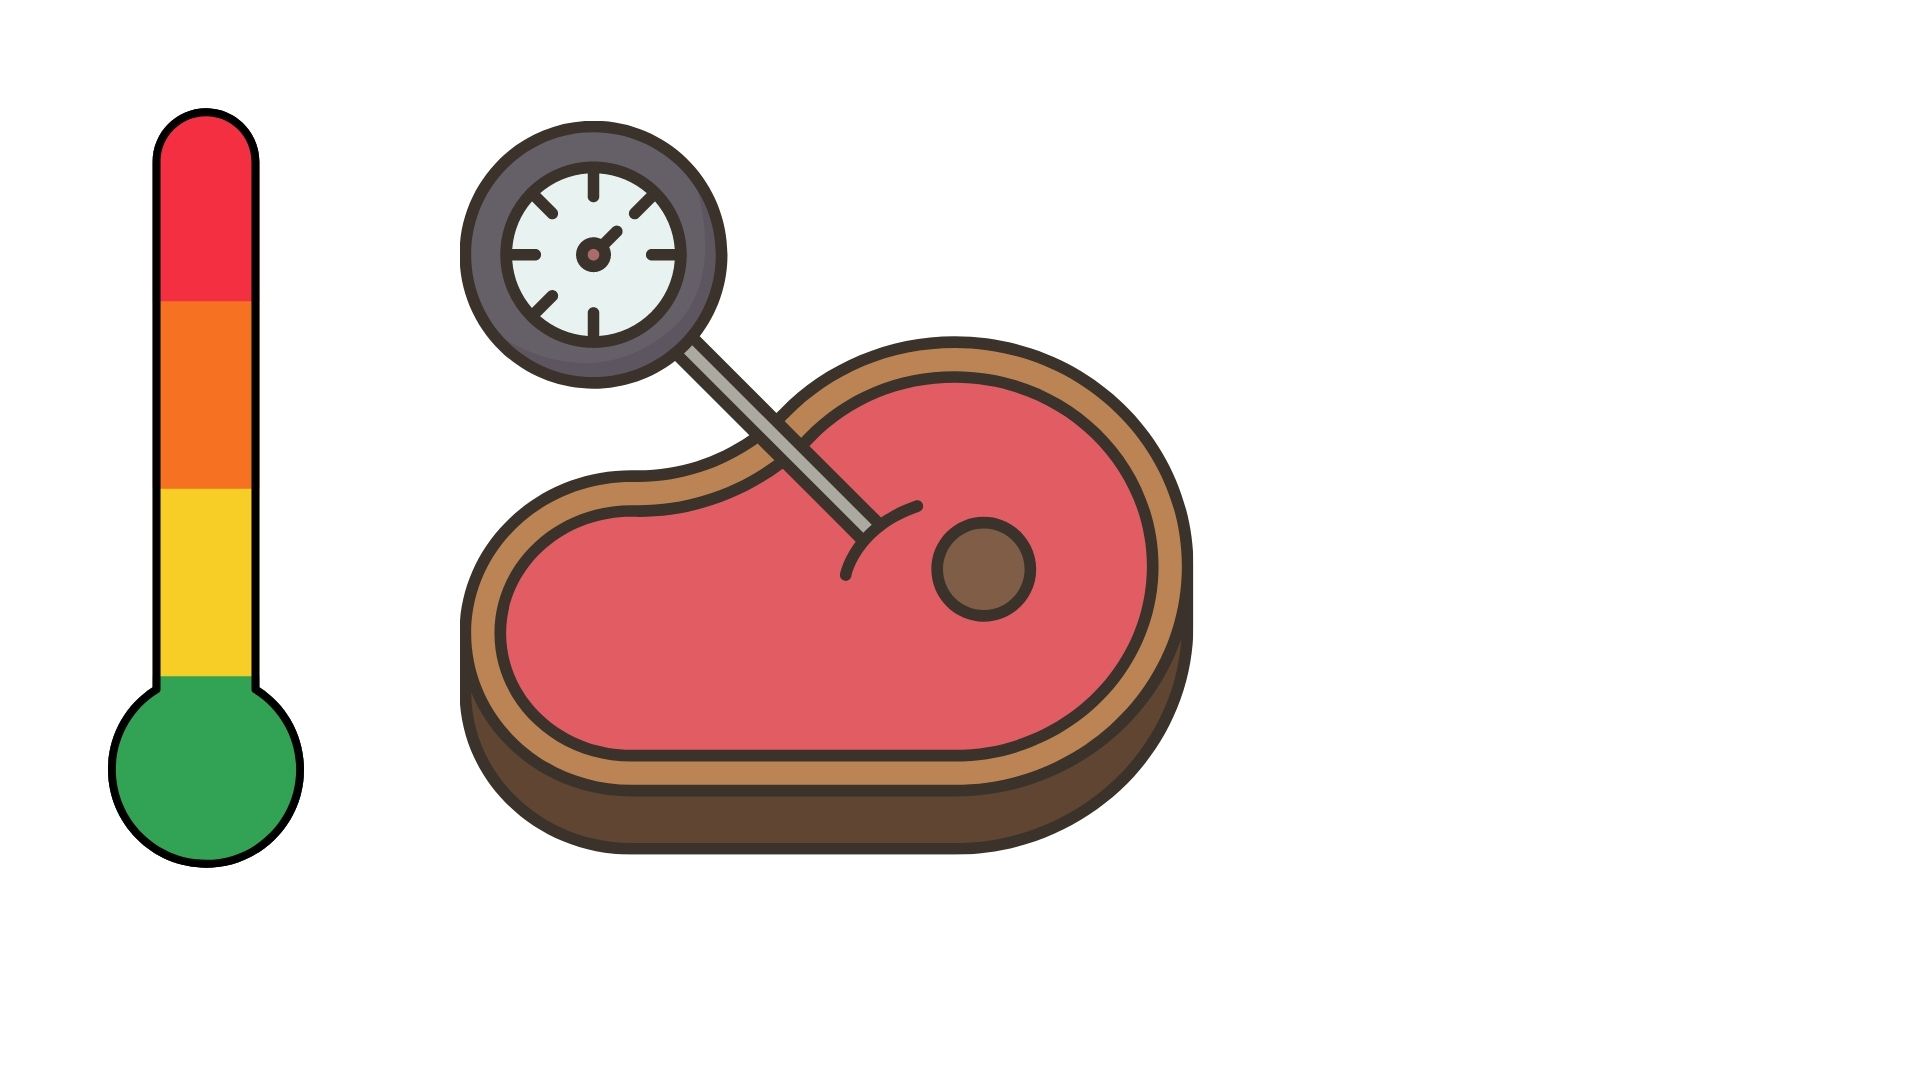
In general:
- Use low (250°) to moderate (375°) heat for large roasts so they'll cook evenly and slowly because high heat would burn the outside of the roast before it's done on the inside.
- High-heat (above 400°) roasting works well for small, tender cuts such as tenderloins because it quickly produces a browned crust, and the meat cooks adequately in a short time.
For prime ribs:
- It is recommended to cook at 450°F for the first 15 minutes before reducing the heat to 325°F.
- After that, lower the temperature to 325 degrees Fahrenheit and continue cooking for 10 minutes per pound.
- When the meat thermometer reads 110 degrees, it's time to take the roast out of the oven.
Rest the Meat
The main reason meat needs to rest is so that the juices can be redistributed. If you cut into a roasted chicken or beef roast right after cooking, all the juices would flow out onto the platter, making the meat drier than usual.
After roasting the meat, transfer it to a carving tray or a roasting pan and then cover it loosely with aluminum foil, creating a foil tent. Let it rest for a few minutes before carving. After cooking, the meat should be rested for 10 to 20 minutes before serving. Large roasts require more time to rest, usually up to 15–20 minutes. Those few extra minutes let the meat cook for a bit longer for maximum tenderness and are a great opportunity to make some gravy from the beef drippings.
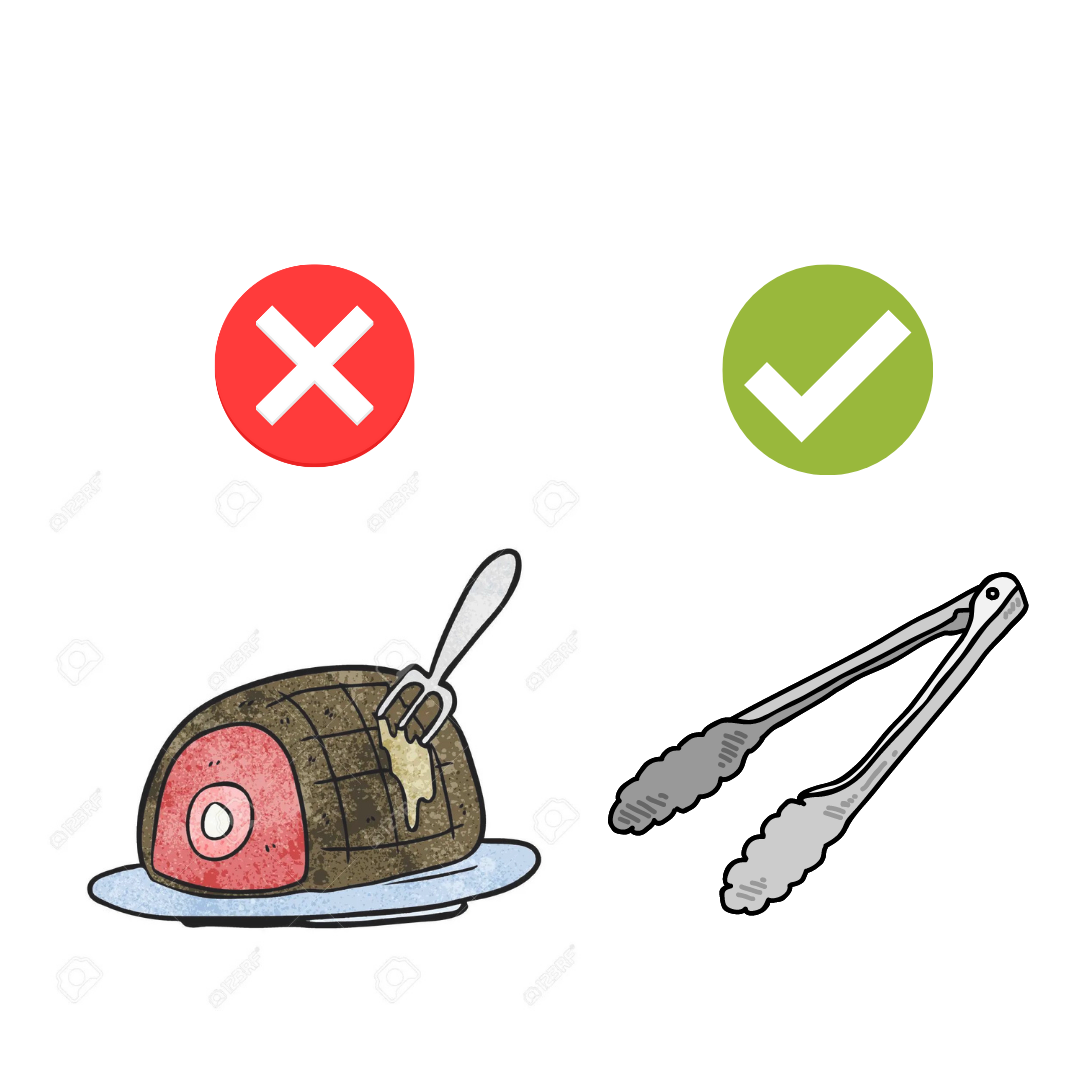
Carve & Serve
The most important tool when carving your roast is a good-quality knife. Be safe! Instead of using the pronged end of the meat carving fork, hold the roasted meat in place by pressing down on the back of the fork. You can also use tongs for this.If you have a beef rib roast, cut each piece along the rib bone. When cutting meat, always slice against the grain for maximum tenderness.
Roast is a fantastic entrée, but it’ll be the focal point of your dining table. When serving a meal, look for opportunities to step up its appearance by choosing to experiment with different carving stations and garnishing options. Surrounding a beautifully prepared piece of meat with vegetables or chestnuts is always a nice touch.
Get the Tools You Need to Become a Pro
Get ready to impress your family and friends with your fantastic roast! Here at Culinary Depot, we provide the tools of the culinary trade for professionals and home cooks. If you'd like to learn more about our roasting ware, contact us today.